Introduction
If you run a small business, freelance, or manage client projects, invoices are essential to keep track of payments. Instead of buying expensive accounting software, you can easily create an invoice in Excel for free.
In this guide, I’ll show you:
- How to make invoice in Excel (step-by-step)
- A free invoice template download
- Tips to customize your Excel invoice professionally
- FAQs about Excel invoicing
By the end, you’ll be able to generate invoices quickly and save time with a ready-to-use Excel invoice template.
What is an Invoice Template in Excel?
An invoice template in Excel is a pre-designed spreadsheet that includes fields like:
- Invoice number
- Date
- Client name & details
- Product/service description
- Quantity, rate, amount
- Tax & total
Instead of creating one from scratch every time, you can simply enter details in the Excel invoice template and send it to clients.
Benefits of Using Excel Invoice Template:
- Free and easy to customize
- Works offline (no internet needed)
- Professional look for freelancers & businesses
- Saves hours of manual work
How to Make Invoice in Excel (Step-by-Step Guide)
Let’s create a professional Excel invoice from scratch:
Step 1: Open a Blank Excel Sheet
Open Microsoft Excel → New Workbook.
Step 2: Add Company Details
At the top-left corner, type your:
- Business/Brand name
- Address
- Phone number & email
- Logo (Insert → Picture → Your logo)
Tip: Use bold fonts & larger size for company name.
Step 3: Add Client Information
Below your details, add a section:
- Client Name
- Client Address
- Contact Number
Step 4: Insert Invoice Information
Create a table with columns like:
- Invoice Number
- Invoice Date
- Due Date
- Payment Terms
Step 5: Create an Itemized List
Insert a table for services/products:
| Item Description | Quantity | Unit Price | Total |
|---|---|---|---|
| Website Design | 1 | $500 | $500 |
| Hosting (1 Year) | 1 | $120 | $120 |
Use Excel formulas:
- Total = Quantity × Unit Price
- Grand Total = SUM of all totals
Step 6: Add Taxes & Discounts
- Insert rows for GST/VAT or discounts.
- Formula:
=SUM(Total Amount + Tax – Discount)
Step 7: Insert Payment Details
At the bottom:
- Bank Name & Account No.
- UPI ID / PayPal / Payment link
Step 8: Style Your Invoice
- Use borders for tables
- Highlight “Total Amount Due” in bold/red
- Add your logo for branding
Now your Excel invoice is ready to send!
Also Read:
How to Remove Duplicates in Excel
Free Invoice Template Download
To save you time, we’ve prepared a ready-to-use Excel invoice template. You can customize it with your business details and start invoicing today.
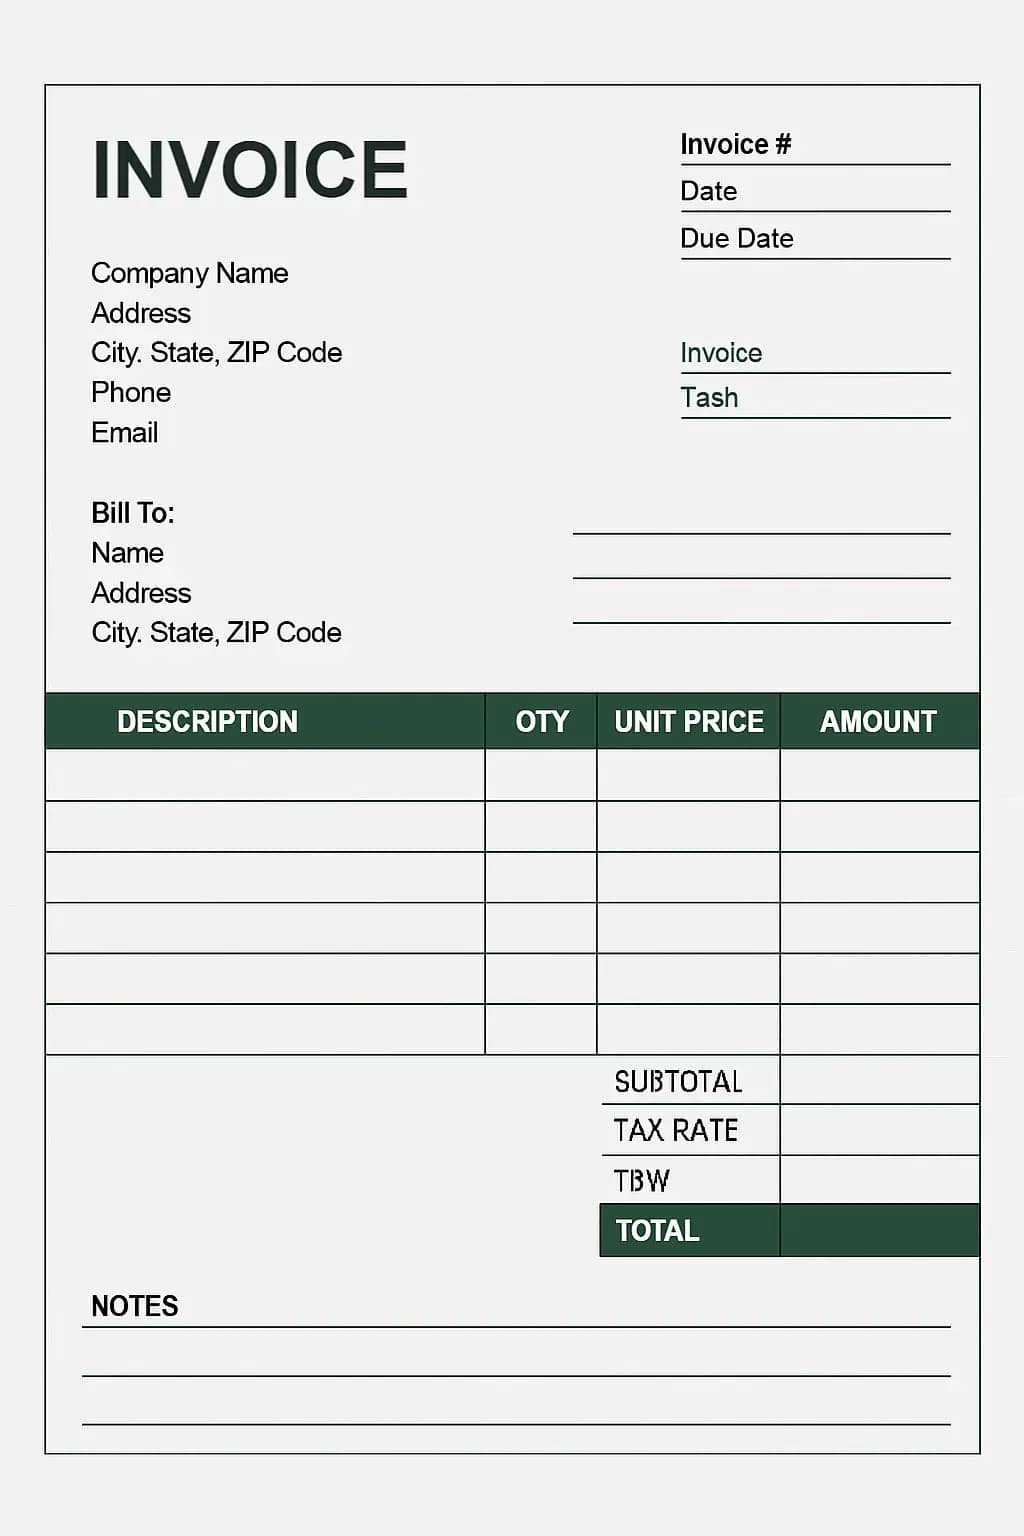
This template includes:
- Pre-built tables for services/products
- Auto-calculation for totals & taxes
- Clean, professional design
No need to spend hours designing—just download, edit, and send!
Example of an Excel Invoice
FAQs on Excel Invoice Templates
1. How to make invoice in Excel for free?
Open a blank Excel sheet, add company & client details, create an itemized product/service table, and apply formulas for totals. Or, download a ready-to-use template for faster results.
2. Can I send an Excel invoice directly to clients?
Yes, but it’s better to save it as PDF (File → Export → Create PDF) before sending to maintain formatting.
3. Is there any free invoice template download for Excel?
Yes, you can get our free invoice template download above and customize it for your business.
4. Why use Excel instead of software for invoices?
Excel is free, customizable, offline, and beginner-friendly. For freelancers & small businesses, it’s a cost-effective solution.
5. Can I automate invoices in Excel?
Yes! With formulas and even Power Automate, you can generate invoices automatically.
Final Thoughts
Creating an invoice doesn’t have to be complicated. With Excel, you can design professional, customizable invoices in minutes.
Use the free invoice template download to save time and start sending invoices today.
If you want to go one step further, check out our guides on:
- Automating invoices with Power Automate
- Excel tips for financial management
With these, your Excel invoice process will be faster, smarter, and more professional.